将数据库升级到 Search 2.x
将数据库从 Search 1.x 升级到 Search 2.x。
| Redis 堆栈 |
|---|
RediSearch 2.x 包含一些重要的体系结构更改,这些更改改进了功能。 主要变化是 RediSearch 2.x 将索引存储在包含数据的 Redis 数据库之外。 这使得命令更高效并改进了集群之间的复制,因为索引更改由参与的集群管理,而不是与数据同步。
此更改允许具有 RediSearch 的数据库支持:
此外,RediSearch 2.x 还会为创建索引时数据库中已存在的数据编制索引。
要将使用 RediSearch 1.x 的 Redis Enterprise Software 数据库升级到 RediSearch 2.x,您必须使用 RediSearch 2.x 设置新数据库并使用RediSearch_Syncer.py脚本将数据从旧数据库复制到新数据库。
先决条件
在计划运行同步脚本的主机上安装 Python 3:
sudo apt install python3
Limitations
- Suggestions (
FT.SUG APIs) and spell check dictionaries are not replicated from the source database. You need to add them manually.
- If there are multiple indexes on the source and the documents do not have prefixes that identify them with an index, RediSearch 2.x can't index the documents in their respective indexes.
- The
NOSAVE option is no longer supported. Indexes created with the NOSAVE option can't be upgraded.
- Databases that contain temporary indexes can't be upgraded.
- Any attempt to add, delete, or modify an index during the upgrade will cause the replication process to fail. During the upgrade, the source database can only receive
FT.ADD and FT.DEL commands.
Replicate data from RediSearch 1.x to RediSearch 2.x
To replicate a RediSearch 1.x database to a RediSearch 2.x database:
-
Sign in to the admin console of the Redis Enterprise cluster where you want to host the new RediSearch 2.x database.
-
Add the RediSearch 2.x module to the cluster.
-
Create a new database with RediSearch 2.x.
-
Migrate data to the RediSearch 2.x database.
Add RediSearch 2.x to the cluster
-
Download the RediSearch 2.x module package from the Redis Download Center.
-
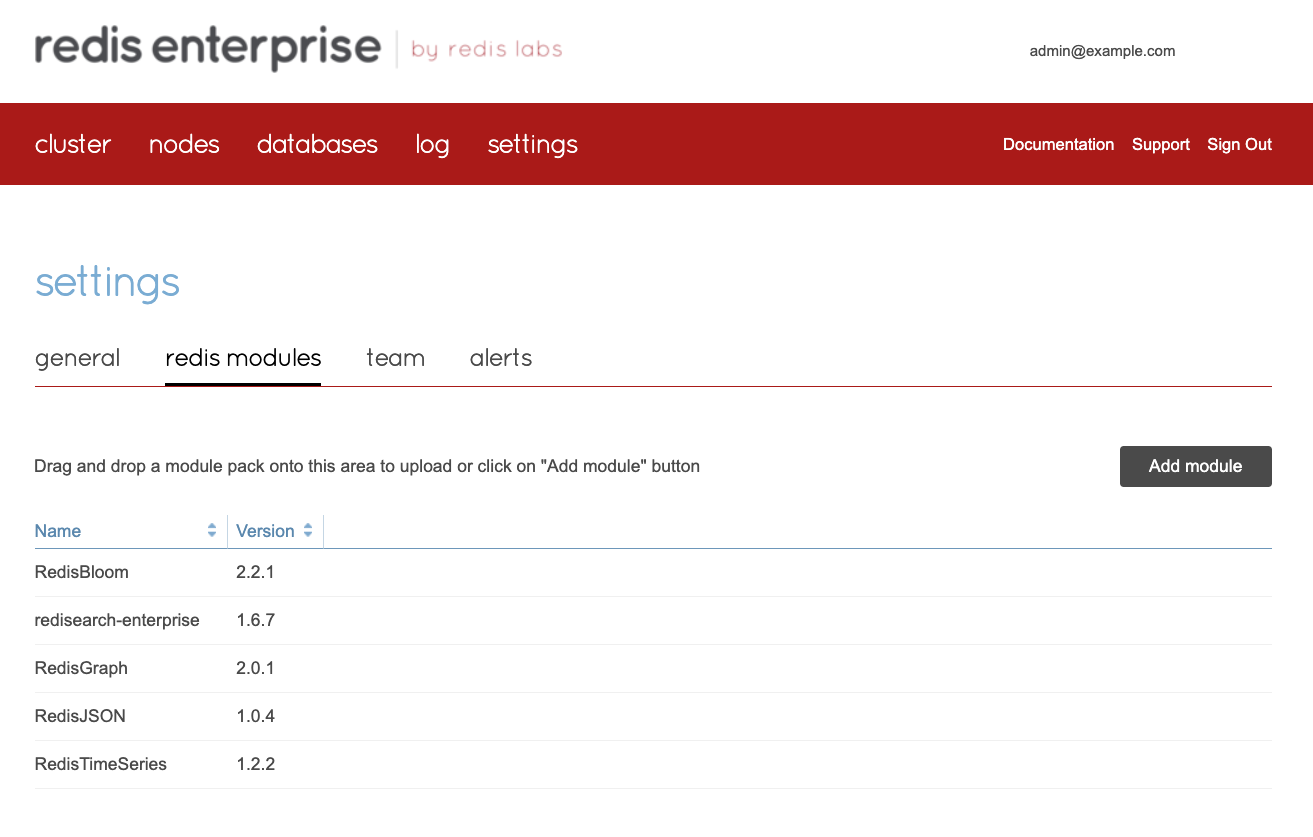
In the Redis Enterprise admin console, select settings.
-
In redis modules, select the Add module button.

-
Use the file browser to select the module package and upload it to the cluster.
Create a RediSearch 2.x database
-
Create a database and configure its settings.
-
In the Redis Modules section:
-
Select the Add button:

-
Select RediSearch 2 from the dropdown list.
-
Select the OK button to confirm:

-
Select the Activate button to create the database.
Migrate data
-
Download the RediSearch_Syncer package for your operating system:
-
Extract the package:
unzip <package_name>
-
In the extracted directory, run the RediSearch_Syncer.py script:
python3 RediSearch_Syncer.py -d <destination_url> -s <source_url> [--add-prefix <prefix>]
Replace the following variables with your own values:
-
destination url - The replication URL of the RediSearch 2.x database. To find this value, go to the database configuration screen in the admin console and select Get Replica of source URL.
-
source url - The replication URL of the RediSearch 1.x database. To find this value, go to the database configuration screen in the admin console and select Get Replica of source URL.
-
--add-prefix <prefix> (optional) - Adds a prefix to all of the hashes that are replicated to the new database.
Note:
Only use the add-prefix option if you want to index all of the hashes in the same index in the source database.
The script shows a table with the progress of the replication process.
Press F5 to see the updated status.
For example:
python RediSearch_Syncer.py -d redis://admin:IBrS0xaL6rShfB1wKTtUkcQG1g3UWAlTd53AotPdTcQvGIVP@redis-19472.cluster1.local:19472 -s redis://admin:1GjFuUbBqTSPDbRfaxEPLSoXpFmRdFxmBKMD0BuxwMJ2DEaO@redis-19636.cluster1.local:19636
-
Stop the processes that are sending requests to the source database so all of the data gets synchronized to the destination database.
-
Run FT.INFO on both source and destination databases and compare the number of indexed documents. The replication process is complete when the number of indexed documents is the same in both databases.
-
When the status field is st_in_sync, you can press Ctrl-C to cancel the synchronization process.
-
Press Q to quit the RediSearch_Syncer.py.
You can now redirect your database connections to the RediSearch 2.x database.
On this page