SAML 单点登录
Redis Cloud 支持使用 SAML(安全断言标记语言)进行 IdP 发起和 SP 发起的单点登录 (SSO)。您可以使用任何身份提供商与 Redis Cloud 集成,只要它支持 SAML 协议,或者您可以参考一些特定提供商的集成指南。
| Redis 云 |
|---|
Redis Cloud 支持使用 SAML(安全断言标记语言)进行 IdP 发起和 SP 发起的单点登录 (SSO)。
您不能使用 SCIM (System for Cross-domain Identity Management) 来预置 Redis Cloud 用户。但是,Redis Cloud 支持即时 (JIT) 用户预置,这意味着 Redis Cloud 会在新用户首次使用 SAML SSO 登录时自动创建用户账户。
SAML SSO 概述
启用 SAML SSO 后,身份提供商 (IdP) 管理员将处理 SAML 用户管理,而不是 Redis Cloud 账户所有者。
您可以使用任何身份提供商与 Redis Cloud 集成,只要它支持 SAML 协议即可。您还可以参考这些集成指南,了解几种常见的身份提供商:
- Auth0 SAML 集成
- AWS IAM Identity Center SAML 集成
- Azure Active Directory SAML 集成
- Google Workspace 集成
- Okta SAML 集成(通用)
- Okta SAML 集成 (Org2Org)
- PingIdentity SAML 集成
为 Redis Cloud 帐户激活 SAML SSO 后,该帐户的所有现有本地用户(设置 SAML SSO 的用户除外)都将转换为 SAML 用户,并且需要使用 SAML SSO 登录。在他们登录到 Redis Cloud 之前,身份提供商管理员需要在 IdP 端设置这些用户,并配置redisAccountMapping属性将其映射到相应的 Redis Cloud 账户和角色。
IdP 发起的 SSO
使用 IdP 启动的单点登录,您可以在登录身份提供商 (IdP) 后选择 Redis Cloud 应用程序。这会将您重定向到 Redis Cloud 控制台,并将您登录到您的 SAML 用户账户。
SP 发起的 SSO
您还可以从 Redis Cloud 控制台启动单点登录。此过程称为服务提供商 (SP) 发起的单点登录。
-
在 Redis Cloud 控制台的登录屏幕中,选择 SSO。

-
输入与您的 SAML 用户账户关联的电子邮件地址。
-
选择 Login 按钮。
-
如果您已经与身份提供商建立了有效的 SSO 会话,则会将您登录到 SAML 用户账户。
-
否则,SSO 流会将您重定向到身份提供商的登录屏幕。输入您的 IdP 用户凭证以登录。这会将您重定向回 Redis Cloud 控制台并自动登录到您的 SAML 用户账户。
-

多重身份验证
账户所有者仍然是本地用户,应设置多重身份验证 (MFA) 以帮助保护其账户。SAML 激活后,账户所有者可以在启用 MFA 的情况下设置其他本地旁路用户。
如果启用了 MFA 实施,请注意 Redis Cloud 不会对 SAML 用户实施 MFA,因为身份提供商会处理 MFA 管理和实施。
设置 SAML SSO
要为 Redis Cloud 账户设置 SAML 单点登录,请执行以下作:
-
设置 SAML 应用程序以将 Redis Cloud 与您的身份提供商集成。
-
下载服务提供商元数据并将其上传到您的身份提供商。
在 Redis Cloud 中验证域所有权
在 Redis Cloud 中设置 SAML SSO 之前,您必须验证您是否拥有与 SAML 设置关联的域。
-
使用与您通过身份提供商设置的 SAML 用户关联的电子邮件地址登录 Redis Cloud。
-
从 Redis Cloud 控制台菜单中选择 Access Management。
-
选择 Single Sign-On。
-
选择 Setup SAML SSO (设置 SAML SSO) 按钮:

-
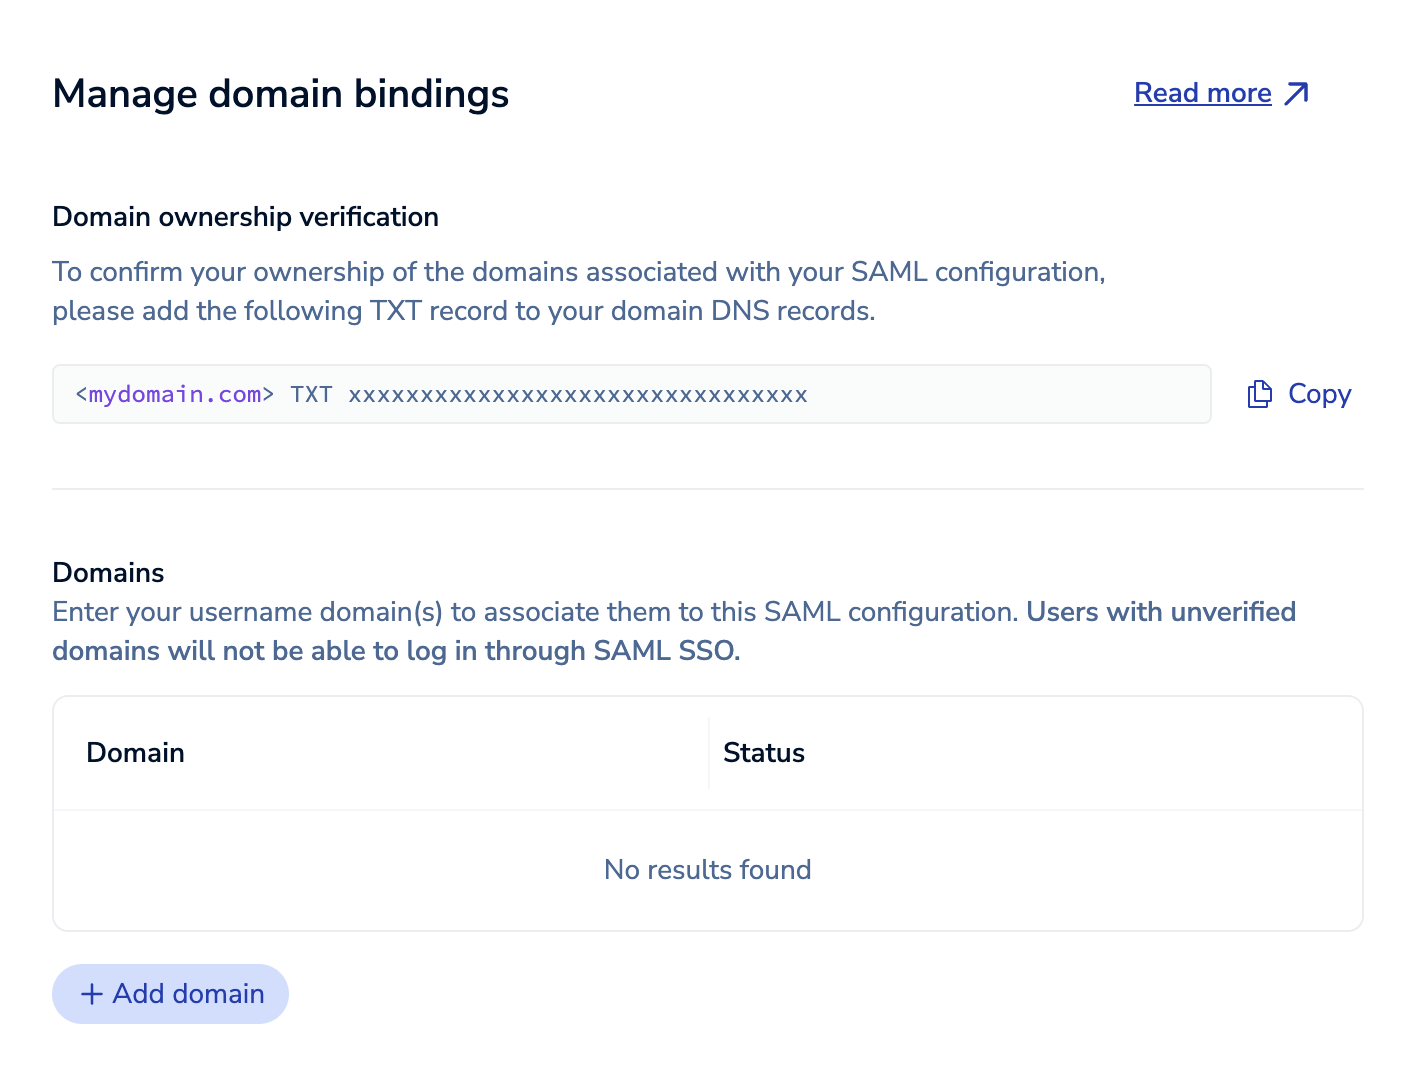
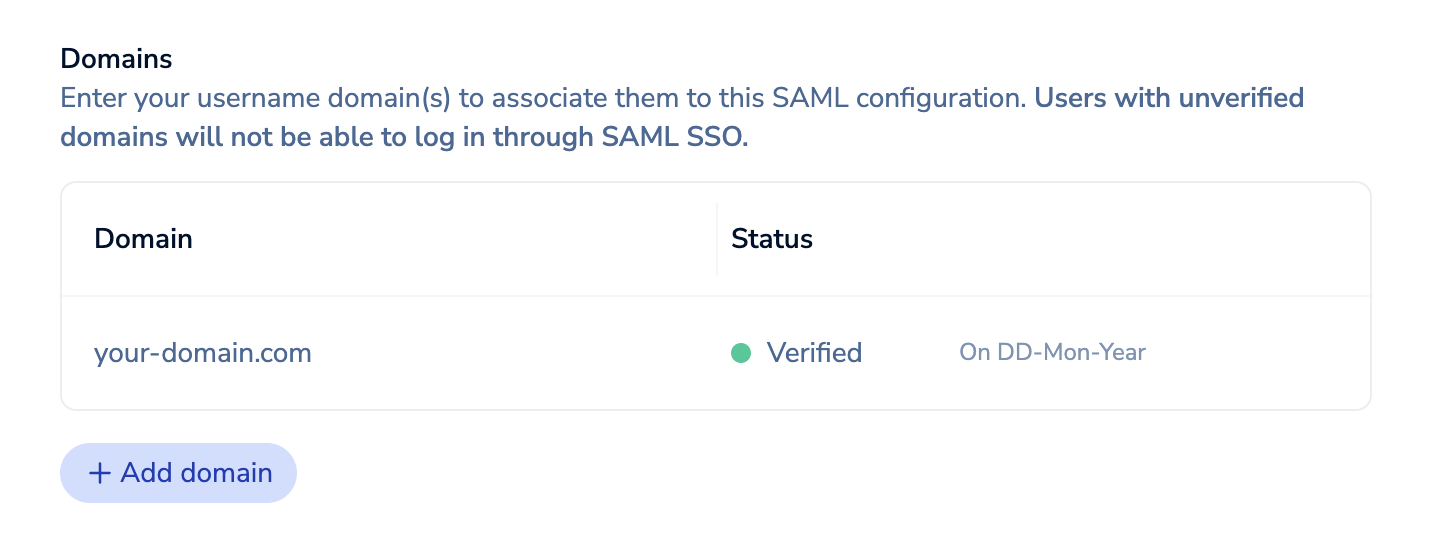
在 Redis Cloud 控制台的 SAML 屏幕中,您必须验证您拥有与 SAML 配置关联的域。选择 添加域 以打开 管理域绑定 面板。


-
选择 Copy (复制) 以复制提供的 TXT DNS 记录。对于要与 SAML 设置关联的每个域,将复制的 TXT 记录添加到其 DNS 记录中。
-
选择 Add domain (添加域) 以添加域。
-
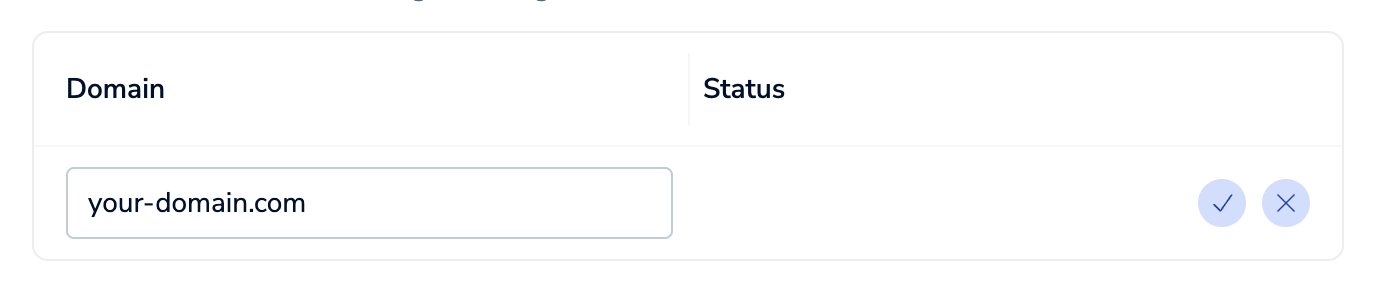
输入域名并选择
 保存,或选择
  取消。
取消。
-
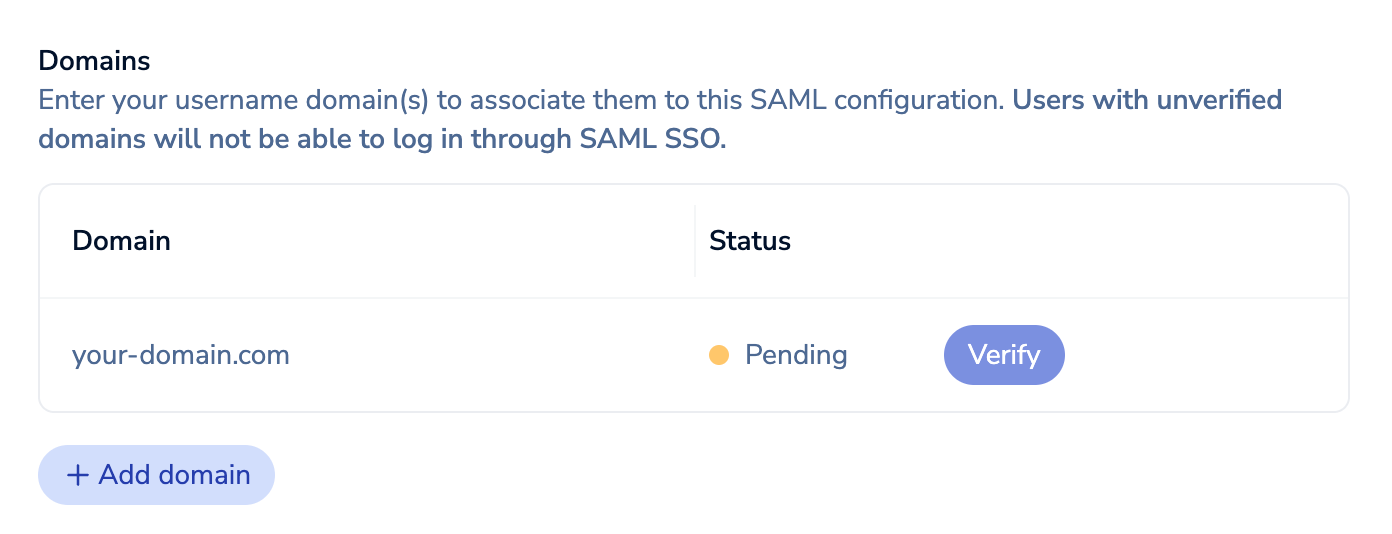
保存域名后,其状态为 Pending (待处理)。选择 Verify 进行验证。

我们将检查域的 DNS 记录中是否有提供的 TXT 记录。如果 TXT 记录不存在或我们无法解析您的域,我们将无法验证该域,并且具有该域的用户将无法使用 SAML SSO 登录。
选择
 以删除错误添加的域。
如果我们找到 TXT 记录,该域的状态将更改为 Verified(已验证)。

您可以选择 Add domain (添加域) 以添加其他域。
-
选择 Close 以关闭域绑定面板。


验证至少一个域后,您可以选择 Manage domains (管理域) 以再次打开 Manage domain bindings (管理域绑定) 面板并添加或验证更多域。
设置 SAML 应用程序
设置 SAML 应用程序以将 Redis Cloud 与您的身份提供商集成:
-
登录您的身份提供商的 Admin Console。
-
为服务提供商 Redis Cloud 创建或添加 SAML 集成应用程序。
-
设置 SAML 服务提供商应用程序,使 SAML 断言包含以下属性:
属性名称
(区分大小写)描述 名字 用户的名字 姓氏 用户的姓氏 电子邮件 用户的电子邮件地址(在 Redis Cloud 控制台中用作用户名) redisAccountMapping 小写角色名称(所有者、成员、管理者、billing_admin或查看者)和用户的 Redis Cloud 账号的键值对,可在账户设置中找到 为
redisAccountMapping中,您可以使用以下选项之一将同一用户添加到多个启用了 SAML 的帐户中:-
包含以逗号分隔的帐户/角色对列表的单个字符串
<saml2:Attribute Name="redisAccountMapping" NameFormat="urn:oasis:names:tc:SAML:2.0:attrname-format:unspecified"> <saml2:AttributeValue xsi:type="xs:string" xmlns:xs="http://www.w3.org/2001/XMLSchema" xmlns:xsi="http://www.w3.org/2001/XMLSchema-instance"> 12345=owner,54321=manager </saml2:AttributeValue> </saml2:Attribute> -
Multiple strings, where each represents a single account/role pair
<saml2:Attribute Name="redisAccountMapping" NameFormat="urn:oasis:names:tc:SAML:2.0:attrname-format:unspecified">
    <saml2:AttributeValue xsi:type="xs:string" xmlns:xs="http://www.w3.org/2001/XMLSchema" xmlns:xsi="http://www.w3.org/2001/XMLSchema-instance">
        12345=owner
    </saml2:AttributeValue>
    <saml2:AttributeValue xsi:type="xs:string" xmlns:xs="http://www.w3.org/2001/XMLSchema" xmlns:xsi="http://www.w3.org/2001/XMLSchema-instance">
        54321=manager
    </saml2:AttributeValue>
</saml2:Attribute>
Note:To confirm the identity provider's SAML assertions contain the required attributes, you can use a SAML-tracer web developer tool to inspect them. -
-
Set up any additional configuration required by your identity provider to ensure you can configure the
redisAccountMappingattribute for SAML users.If your identity provider lets you configure custom attributes with workflows or group rules, you can set up automation to configure the
redisAccountMappingfield automatically instead of manually.
Configure SAML in Redis Cloud
After you set up the SAML integration app and create a SAML user in your identity provider, you need to configure your Redis Cloud account to set up SAML SSO.
-
Sign in to Redis Cloud with the email address associated with the SAML user you set up with your identity provider.
-
Select Access Management from the Redis Cloud console menu.
-
Select Single Sign-On.
-
Verify at least one domain if you haven't.
-
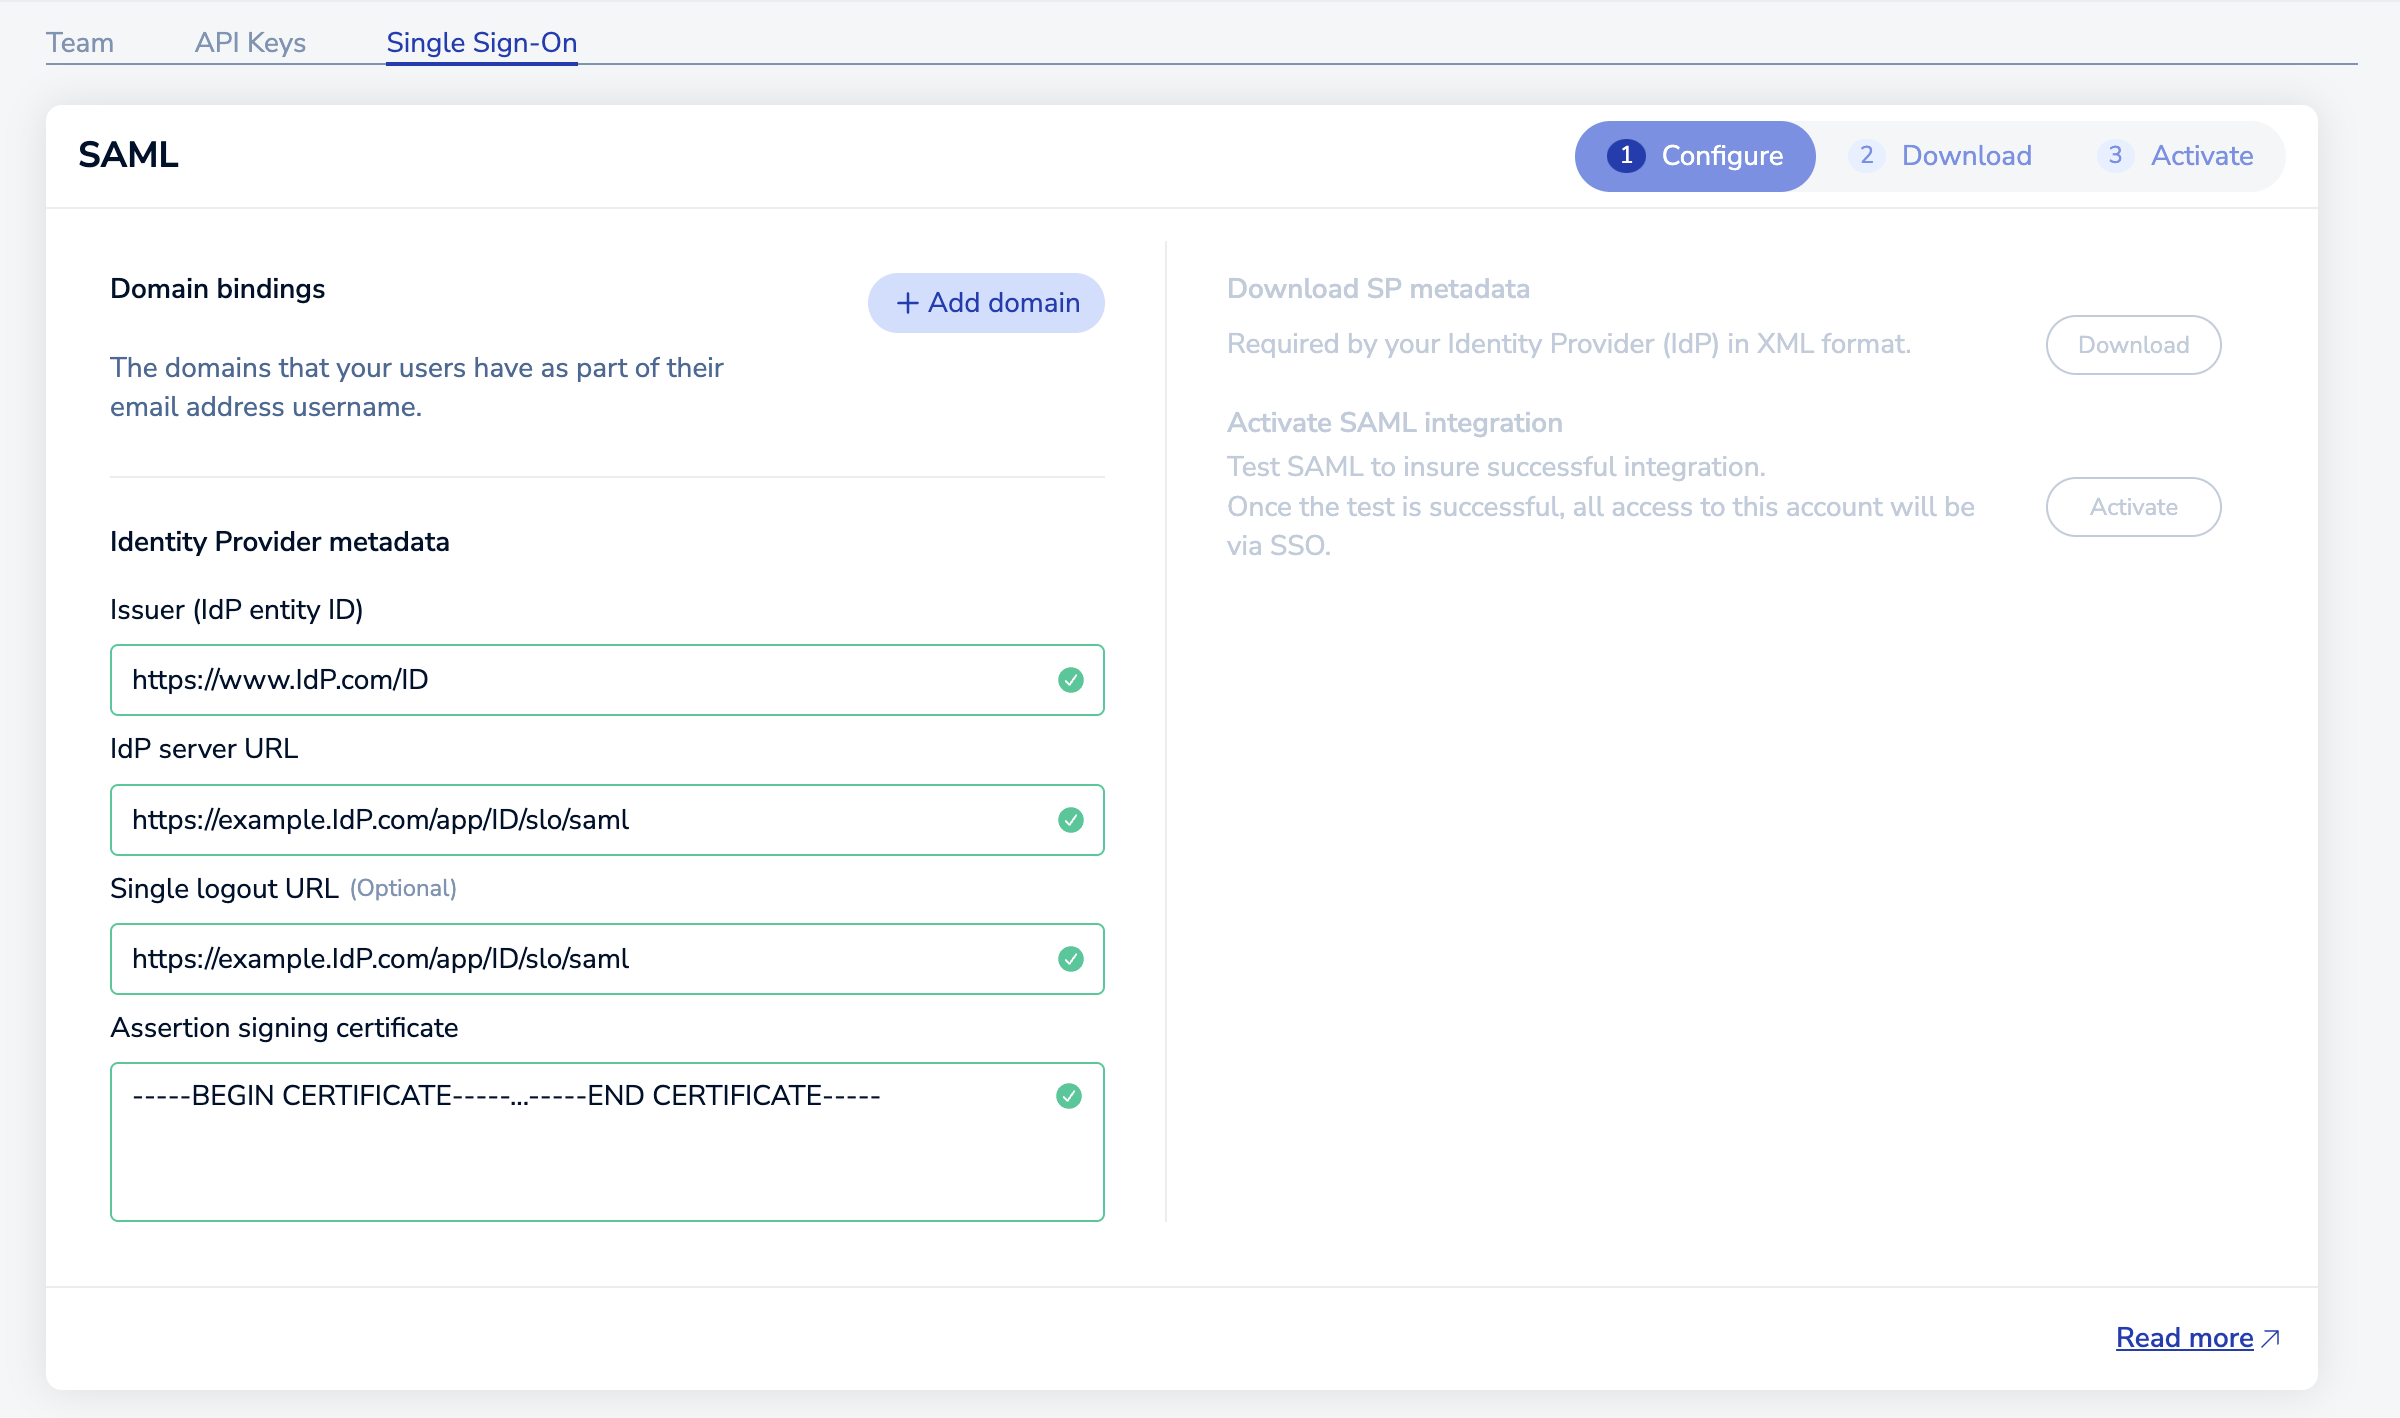
Configure the Identity Provider metadata settings.

To do so, you need the following metadata values from your identity provider:
Setting
Description
Issuer (IdP entity ID)
The unique entity ID for the identity provider
IdP server URL
The identity provider's HTTPS URL for SAML SSO
Single logout URL
The URL used to sign out of the identity provider and connected apps (optional)
Assertion signing certificate
Public SHA-256 certificate used to validate SAML assertions from the identity provider
To find these metadata values, see your identity provider's documentation.
-
Select Enable.

-
From the SAML activation dialog box, select Continue.
Download service provider metadata
Next, you need to download the service provider metadata for Redis Cloud and use it to finish configuring the SAML integration app for your identity provider:
-
Select the Download button to download the service provider metadata in XML format.
-
Sign in to your identity provider's admin console.
-
Configure the Redis Cloud service provider app with the downloaded XML.
-
Some identity providers let you upload the XML file directly.
-
Others require you to manually configure the service provider app with specific metadata fields, such as:
XML attribute
Value
Description
EntityDescriptor's entityID
https://auth.redis.com /saml2/service-provider /<ID>
Unique URL that identifies the Redis Cloud service provider
AssertionConsumerService's Location
https:// auth.redis.com /sso/saml2/<ID>The service provider endpoint where the identity provider sends a SAML assertion that authenticates a user
-
To use IdP-initiated SSO with certain identity providers, you also need to set the RelayState parameter to the following URL:
https://cloud.redis.io/#/login/?idpId=<ID>
Replace <ID> so it matches the AssertionConsumerService Location URL's ID.
To learn more about how to configure service provider apps, see your identity provider's documentation.
Activate SAML SSO
After you finish the required SAML SSO configuration between your identity provider and Redis Cloud account, you can test and activate SAML SSO.
All users associated with the account, excluding the local user you used to set up SAML SSO, are converted to SAML users on successful activation. They can no longer sign in with their previous sign-in method and must use SAML SSO instead. However, you can add local bypass users after SAML SSO activation to allow access to the account in case of identity provider downtime or other issues with SAML SSO.
To activate SAML SSO:
-
Sign out of any active SSO sessions with your identity provider.
-
For Activate SAML integration, select the Activate button.
-
From the Logout notification dialog, select Continue. This redirects you to your configured identity provider's sign-in screen.
-
Sign in with your identity provider.
-
When redirected to the Redis Cloud sign-in screen, you can either:
-
Sign in with your local credentials as usual.
-
Select SSO and enter the email address associated with the SAML user configured in your identity provider. Your user converts to a SAML user in Redis Cloud. Don't use this method if you want your user account to remain a local bypass user.
Note:
If you see a SAML activation failed notification when redirected to the Redis Cloud sign-in screen, sign in with your local user credentials and review the SAML configuration for issues.
After you activate SAML SSO, add a few local bypass users from the Team tab. Local bypass users should set up MFA for additional security.
Update configuration
If you change certain metadata or configuration settings after you set up SAML SSO, such as the assertion signing certificate, remember to do the following:
-
Update the SAML SSO configuration with the new values.
-
Download the updated service provider metadata and use it to update the Redis Cloud service provider app.
Link other accounts
After you set up SAML SSO for one account, you can link other accounts you own to the existing SAML configuration. This lets you use the same SAML configuration for SSO across multiple accounts.
To link other accounts to an existing SAML SSO configuration:
-
Sign in to the Redis Cloud console with the account that has an existing SAML configuration.
-
Go to Access Management > Single Sign-On.
-
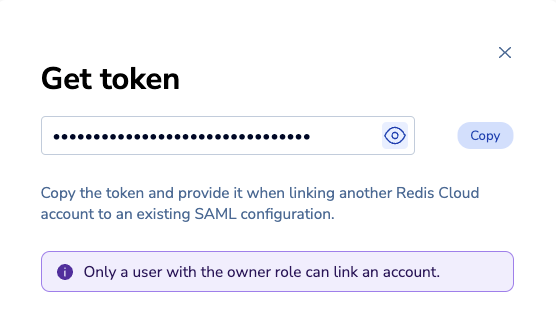
Select Get token.

Select Copy to copy the linking token.
-
Sign in to the account that you want to link to the SAML configuration. Go to Access Management > Single Sign-On and then enter the copied token into the Join an existing SAML configuration text box. Select the arrow to confirm.
After you do this, the owner of the original account will receive a request to link the new account to the SAML configuration.
-
Sign in with the original account and select Access Management > Single Sign-On. You should see the new account in the Unlinked accounts list.
Note:
To see and interact with the Redis Cloud account in the Unlinked accounts list, you must be an owner of the account. If you are not an owner, the account will not be displayed in the section.
-
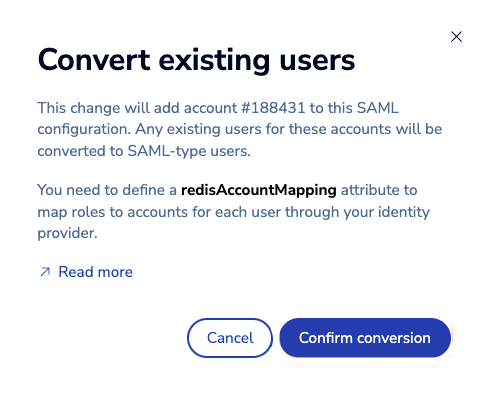
Select Link account.

-
In the Convert existing users dialog, select Confirm conversion to finish linking the accounts.

Deactivate SAML SSO
Before you can deactivate SAML SSO for an account, you must sign in to the account as a local (non-SAML) user with the owner role assigned.
Deactivating SAML SSO for an account also removes any existing SAML-type users associated with the account.
To deactivate SAML SSO for a specific account:
-
In the Redis Cloud console, select your name to display your available accounts.
-
If the relevant account is not already selected, select it from the Switch account list.
-
Go to Access Management > Single Sign-On.
-
Select Deactivate SAML. This only deactivates SAML SSO for the current account. Other linked accounts continue to use this SAML SSO configuration.
-
Select Deactivate to confirm deactivation.
Deprovision SAML users
When a user is removed from your identity provider, their access to Redis Cloud should also be removed.
When you have revoked a user’s access to Redis Cloud, they cannot access the Redis Cloud console, but their API keys remain active. You can delete an API key to remove access.
To deprovision SAML users upon deletion, the identity provider admin can set up a webhook to automatically make the appropriate Cloud API requests. For more information about managing users with API requests, see Users in the Redis Cloud API documentation.

On this page